Tutorial on forcing a robot to flash ROM under abnormal circumstances
Need to prepare tools
- Flashing tool RKDevTool
- Download firmware ROM: https://global.letianpai.com/all/?p=1680
- Metal tweezers
Flashing process
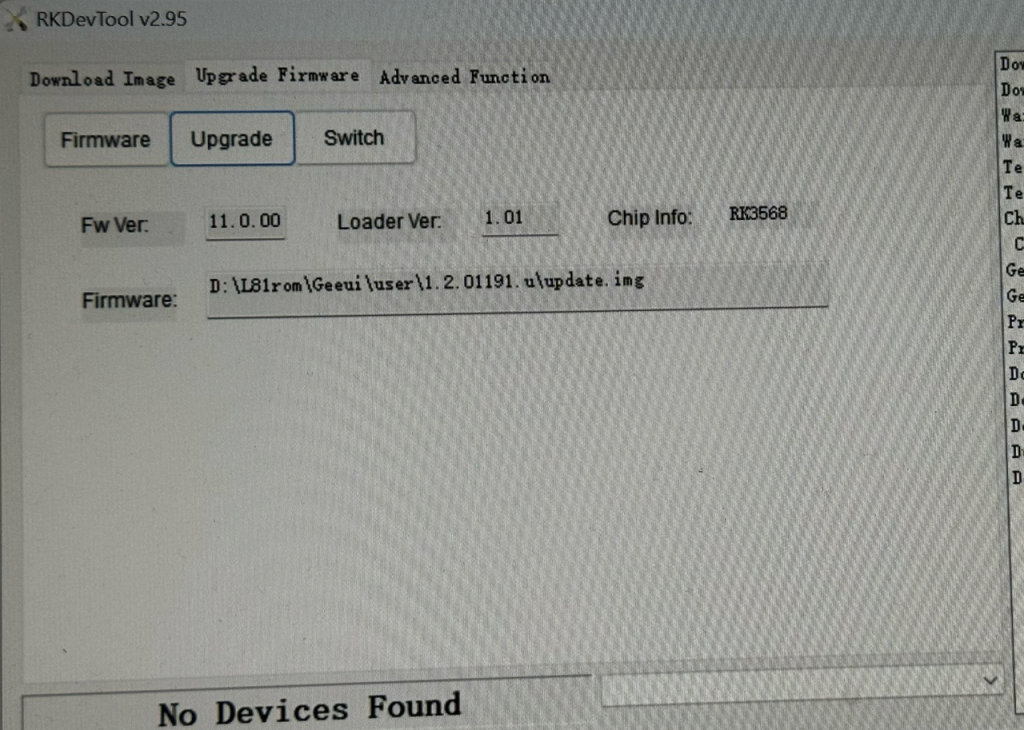
- Open the flashing tool RKDevTool
2. Press and hold the reset hole of the robot with a card pin to shut it down.
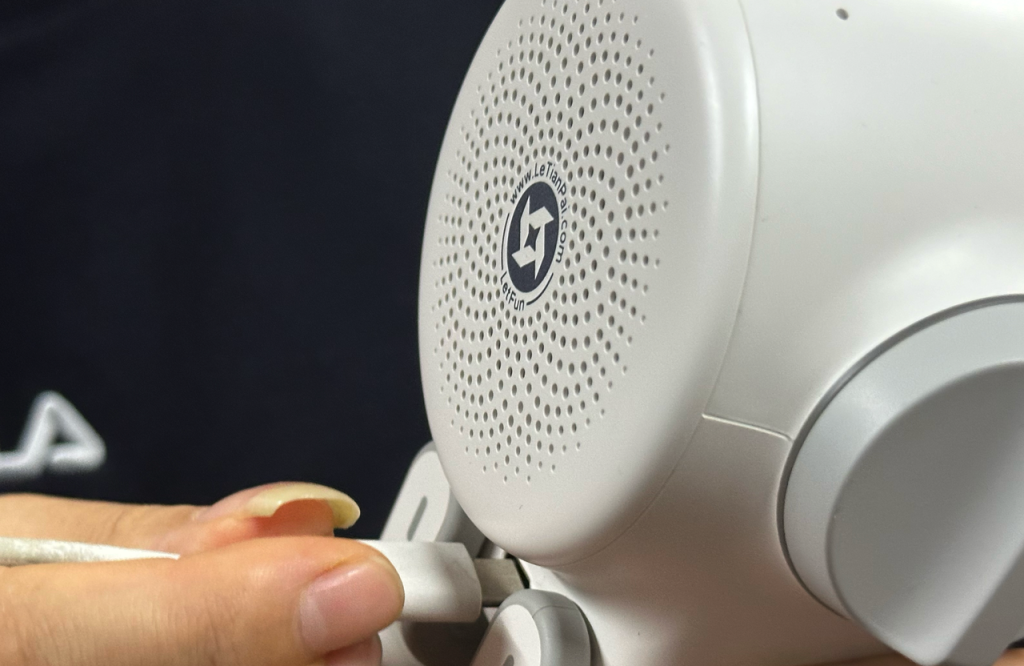
3. Refer to the video to open the screen panel of the robot
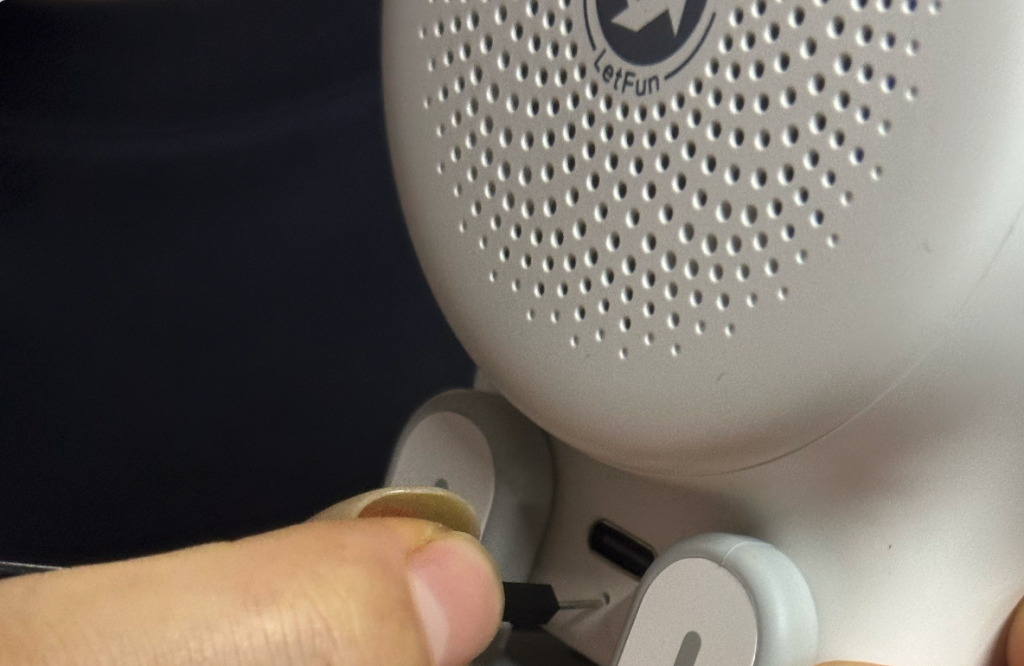
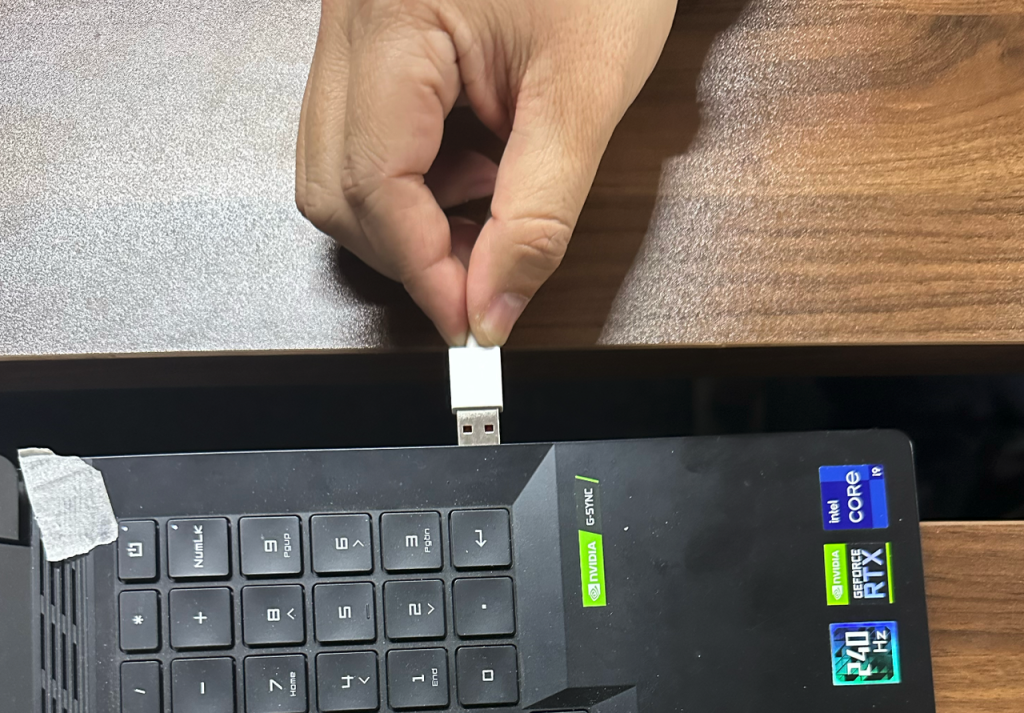
4. Use a USB-C data cable to connect the robot, keeping the other end of the USB-C data cable unconnected to any devices, as shown in the figure below.

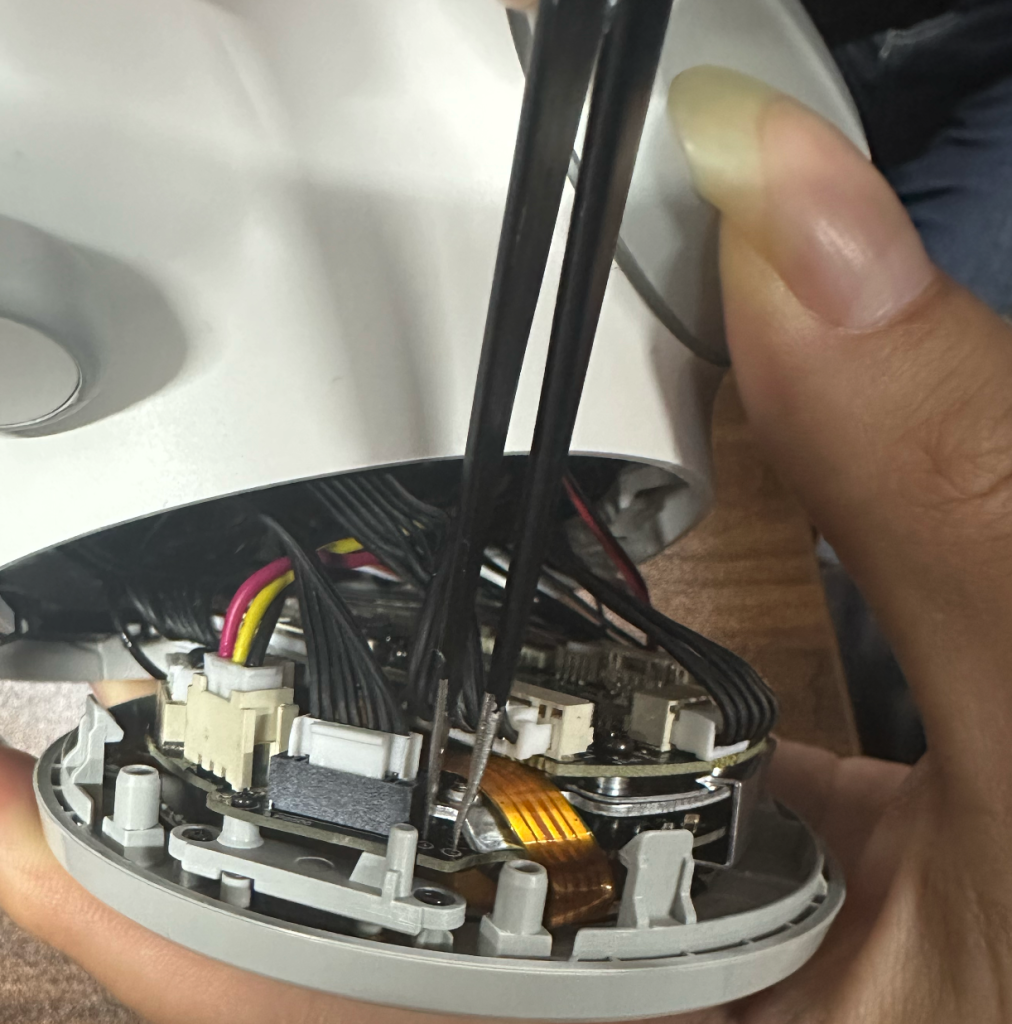
5. Find a pair of metal tweezers and press both ends of the tweezers against the two metal dots on the robot screen panel to maintain the connection. The specific metal dots are shown in the figure below to ensure that they are not pressed incorrectly.

- After connecting the metal dots with tweezers, insert the other end of the data cable into the computer.
Note: At this time, the robot will not turn on. If the robot turns on, it means that the metal point is not in contact with the tweezers and needs to repeat the above steps to start over
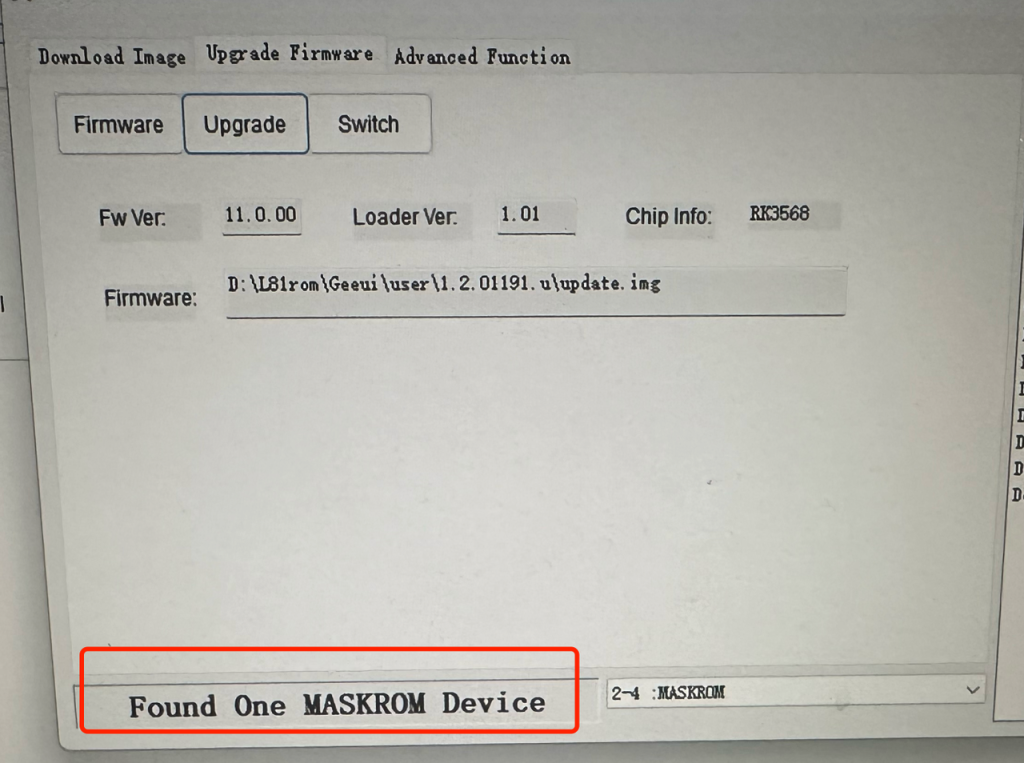
7. If the data cable is plugged into the computer, the flash tool will display Found One MASKROM Device, as shown in the figure below. After Found appears, you can disconnect the tweezers and metal dots
Note: The robot screen should be black at this time
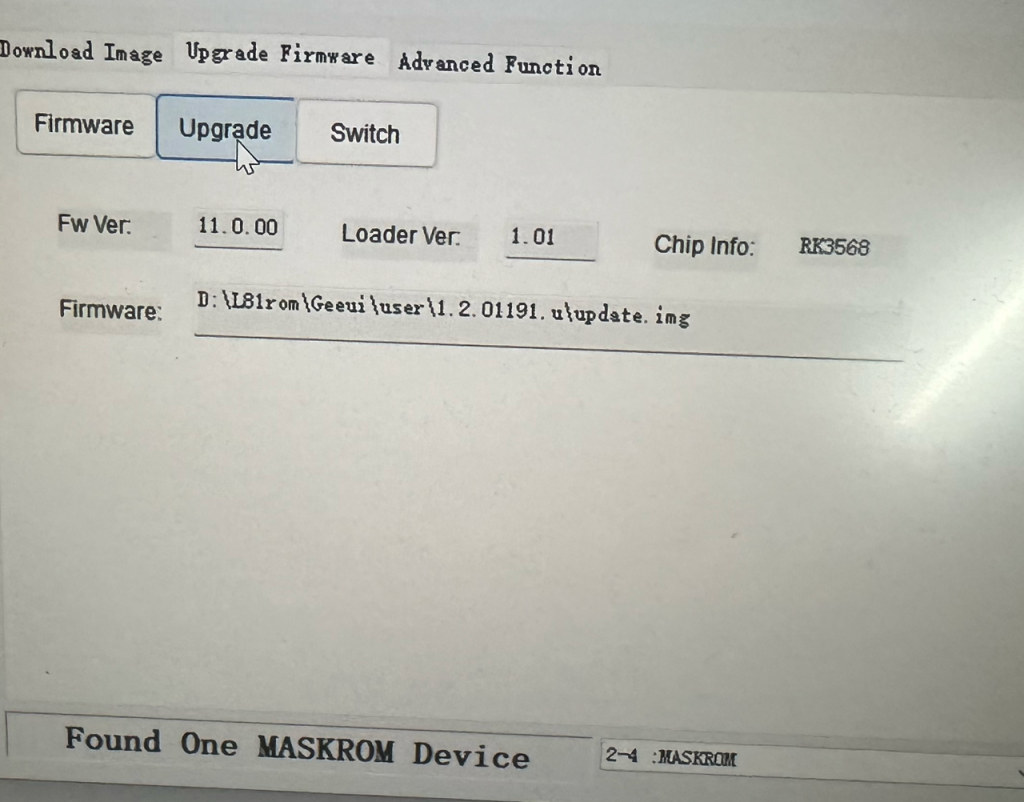
8. Click Firmware, select the corresponding firmware ROM, and confirm
9.Click Upgrade to start flashing.
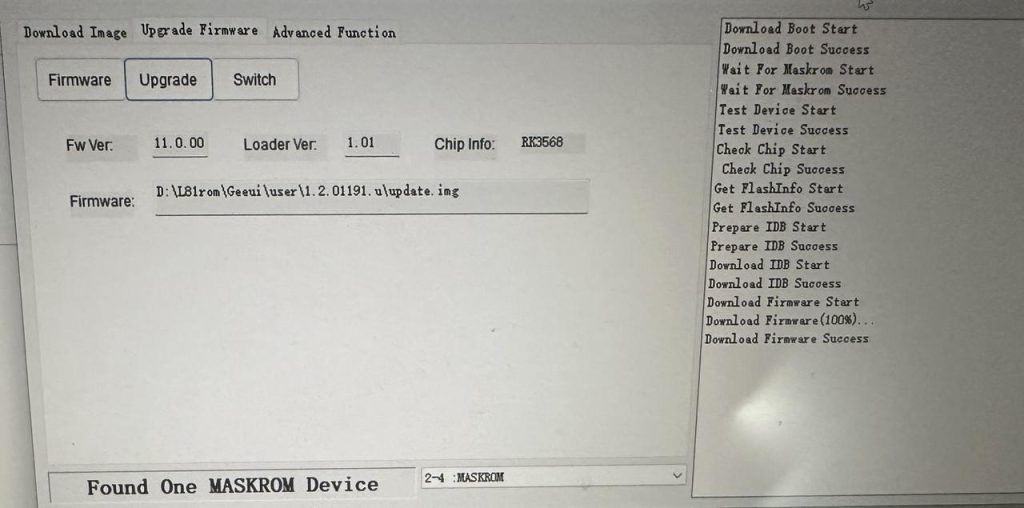
10. During the flashing process, please refer to the figure below. After waiting for the Download Firmware Success to appear, it proves that the flashing is successful. If it fails, please restart.
Note: Do not disconnect the data cable during the flashing process
11. After successful flashing, merge into the robot screen.

You May Also Like

“AI Summary” feature introduction of Rux Robot

How to Use the “AI Summary” Feature of Rux Robot